
In this article Getting Started with Process Builder: Add Chatter Followers to Record, we had discussed a way to auto add Chatter followers to account record using the Process Builder. But It will only work for System administrators or users with the Edit permission on account object. There are few business scenarios where a business wants to implantation this for all users, so that anyone can add followers without editing the account record.Let’s start with a business use case
Business Use case :- Vigne Kozacek is working as System administrator in Universal Container. They normally grant read access to account records to account team members. He received a requirement to develop an application, that will allow users to add Chatter followers to the account record without editing it.
Solution of above business requirement
There are few solutions possible for the above business scenario. We will use Flow and Process Builder (because it runs in system mode) to solve the above business requirement. Before proceeding ahead, you have to understandUser mode and System mode in Salesforce.
- System mode :- In which the object and field-level permissions of the current user are ignored.
- User mode :- In which the permissions, field-level security, and sharing rules of the current user are enforced.
A few points to remember
- Flow runs in user mode.
- Process Builder runs in system mode.
- When you launch a Flow using the Process Builder, then it will run in system mode.
Designing the application
- We will use a custom button on the account page layout to launch a Flow (#1). Flow will capture the data i.e. Account Id and Follower Id (User Id whom they want to make a follower of the record) from the user
- Then we will save the details in a custom object Add Follower using the Flow(#1)
- Then we will create another Flow (#2) to add the followers to account record
- On creation of record in Add Follower object we will trigger the Process to launch a Flow(#2), this Flow will responsible to add followers to record
Follow the below instructions to create a Flow and Process Builder to solve the above business requirement
1. First of all create a custom object (Add_Follwer__c) and few fields to Save the data, as shown in the following screenshot

Make sure that you have granted Read, Create and Delete access on custom object to all profiles.
2. To create a Flow, click on Name | Setup | App Setup | Create | Workflows & Approvals | Flows
3. Click on New Flow, it will open Flow canvas for you. Now we have to create a Text variables VarT_AcountId to store the account Id (we will pass the account Id through custom button URL) as shown in the following screenshot
3. Click on New Flow, it will open Flow canvas for you. Now we have to create a Text variables VarT_AcountId to store the account Id (we will pass the account Id through custom button URL) as shown in the following screenshot

4. The next step is to create a screen that allows the user to enter the follower name. To do that drag-and-drop aScreen element ( Give the name Enter Follower) onto the canvas. To add a field onto the Screen click on Add a Field tab ( Give the name Enter Follower Name ) and then add one Textbox field to enter User Full Name as shown in the following screenshot

5. The next task is to display all users where the User Full Name matches with Screen1 input field. To do that drag-and-drop Screen Element ( Give the name Choose Follower) onto canvas, add Radio button ( Give the name Choose Follower Name) as shown in the following screenshot

- Now select Dynamic choice as shown in the above screenshot ( Give the nameChooserFollowerFromUser), select User object, Add filters criteria as Name ContainsEnter_Follower_Name (Screen1 Input field) and IsActive Equals {!$GlobalConstant.True}. UnderChoice Label select Name and under Choice Stored Value select Id as shown in the following screenshot

6. To create a record in Add_Follower__c object we will use Record Create element. Drag-and-drop a Record Create( Give the name Save the data in Add Follower object) onto the canvas and map the fields according to below details
- Select Object Add_Follower__c
- Enter Assignment AccountId= {!VarT_AccountId} and FollowerId= {!ChooseFollowerFromUser}(Dynamic Choice), as shown in the below screenshot

7. Finally your Flow #1 will look like the following screenshot

8. Save your flow with name Add details to custom object and close the canvas. Don’t forget to Activate the Flow

9. The next step is to create a custom button (Add Follower) on the Account object to call the Flow and pass the {!Account.Id} into variable VarT_AccountId
Custom button URL :- /flow/Add_details_to_custom_object?VarT_AccountId={!Account.Id}&retURL=https://ap1.salesforce.com/{!Account.Id}
10. Till now we have created a Flow to take the input from user and save the data into a custom object. Now we will create another Flow to add follower to account record. For this click on Name | Setup | App Setup | Create | Workflows & Approvals | Flows
11. Click on New Flow, it will open Flow canvas for you. Now we have to create two Text variables VarT_AcountIdand VarT_FollowerId as shown in the below screenshot

12. To create a record into EntitySubscription object, drag-and-drop a Record Create ( Give the name Add follower to record) onto the window and map the fields according to below details
- Select Object EntitySubscription
- Enter Assignment ParentId= {!VarT_AccountId} and SubscriberId= {!VarT_FollowerId}, as shown in the below screenshot

13. Now we have to delete the record from Add_Follower__c object that we had created to save the follower details. To do that, drag-and-drop a Record Delete ( Give the name Delete record from Add Follower object ) onto the window and map the fields according to following screenshot

14. Finally your Flow #2 will look like the following screenshot

15. Save your Flow with name Add follower to record (Type:- Autolaunched Flow) and close the canvas. Don’t forget to Activate the Flow.
Launch a Flow (#2) from Process Builder
Our next task is to create a process on the Add_Follower__c object to launch a Flow. To create a workflow on the Add_Follower__c object follow the below instructions
1. Click on Name | Setup | App Setup | Create | Workflows & Approvals | Process Builder and click on the Newbutton, Enter Name, API Name and then click on the Save button

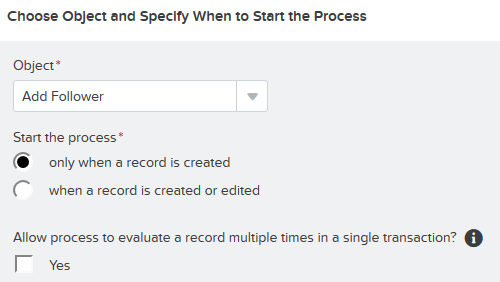
2. The next step is to add entry criteria. For this click on Add Object, select Add_Follower__c object and for the entry criteria, Select only when a record is created, as shown in the below screenshot, once you are done click on theSave button
3. The next task is to add Process Criteria, To do this click on Add Criteria, enter Name, Type of action and for filter conditions select No Criteria – just execute the actions! and click on the Save button, as shown in the following screenshot

4. The next step is to add an Immediate action to Process. Click on Add Action (Under Immediate actions), Select the type of action to create (In our case Flows) , and then fill out the fields to define the action, as shown in the following screenshot

5. Once you are done, click on the Save button, it will redirect you to Process canvas. Finally the Process will look like the following screenshot

Don’t forget to active the Process by clicking on the Activate button.
It’s time to test this App
1) In this demo I am going to use Demo User account (Profile assigned :- Standard User Clone, this user only hasRead access on the Account and Read, Create and Delete access on custom object Add_Follower__c ).

2) The next step is to click on Add Follower button and follow the instructions available on Flow screen.

Finally checkout the Follower section available on the record detail page.
Note :- I will suggest you to implement this first on your developer org test it and then move it to Production.
Post a Comment